Use Sentence Transformers in AWS Lambda with EFS
A simple method for generating sentence embeddings for your applications using SentenceTransformer in AWS Lambda with EFS.
Sentence Transformer (or SBERT) continues to play an instrumental role in all deterministic and generative models. Sentence embedding, semantic search, and semantic similarity are a few of the most widely used applications of Sentence Transformer.
Originally, the core models of SBERT were fine-tuned on sentence pairs using the siamese architecture. This crucial aspect distinguishes S-BERT (Sentence-BERT) from BERT.
The Sentence Transformer package (available on PyPI and conda) is not limited to the pre-trained models available on the official SBERT website. Other transformer models can also be invoked using the same package. Check the model card on HuggingFace for availability.
Example of invoking a non-core model with SentenceTransformer:

This makes the SentenceTransformer package incredibly useful.
In this article, we will explore how to utilise SentenceTransformer in AWS Lambda with minimal initialisation time by reducing the package size.
The purpose of this article is to help you in building products that extensively utilise the embedding capabilities of Sentence Transformer.
Table of contents
- SentenceTransformer GPU vs CPU
- Install CPU only SentenceTransformers
- Download and save SBERT models
2. Using with EFS in Lambda
- Create EFS and an access point
- Load EFS with SentenceTransformers and pytorch models
- Create Lambda and invoke the model
3. Overview of other methods to use SentenceTransformers
- Using with Lambda container images
- SageMaker endpoints
- SageMaker BYOC
- When to choose which approach
SentenceTransformer GPU vs CPU
If you perform a simple installation of SentenceTransformer on your system using either pip or conda, the size of the package, along with all its dependencies, will be close to 5.5 GB.
pip install sentence-transformers

# OR

conda install -c conda-forge sentence-transformers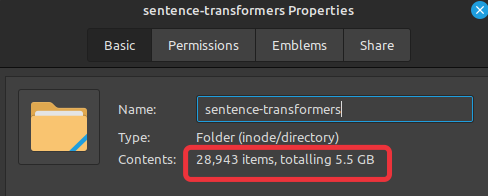
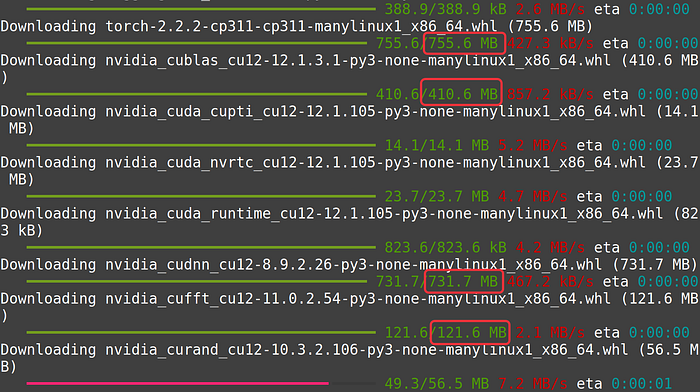
The large size is due to the inclusion of GPU-supported packages, especially PyTorch, which Sentence Transformers install by default.
SentenceTransformers perform exceptionally fast on GPU, hence preference is given to GPU-supported packages during the vanilla installation.
However, when using it with AWS Lambda, GPU-supported packages with PyTorch are unnecessary. Therefore, we must first perform a special installation of the packages that are dependencies for SentenceTransformer.
During this special installation, we will first manually install CPU-only packages, mainly PyTorch. And then, we will install the SentenceTransformer package without any additional dependencies.
The size of the entire CPU-only SentenceTransformer package is around 1.2 GB. Due to this smaller size, Lambda initialization is much faster. It also consumes less memory if deployed on an AWS SageMaker endpoint, owing to the smaller container size.
Using CPU-only packages is not a mandatory requirement for using SentenceTransformers with Lambda or SageMaker. Personally, I have used the GPU version for a long time without any issues. The GPU packages do not throw any errors on AWS Lambda when used with either EFS or S3. Similarly, using SageMaker endpoint instances without GPU also works fine when used with full GPU SentenceTransformers.
Installing SentenceTransformer CPU only
First, install CPU-only PyTorch. Official instructions can be found here.
pip install \
  --target layer/python torch torchvision torchaudio \
  --extra-index-url https://download.pytorch.org/whl/cpu
We specify a --target because, if needed, we want to be able to zip the package later and put it in EFS via S3. With this argument, all the packages will be installed inside the layer/python directory. Create this directory using mkdir -p layer/python.
layer/pythonis a path I used before realizing that this is generally used for Lambda layers. So, if you are knowledgeable about this, feel free to choose a better path.
Second, install other dependencies of SentenceTransformers package. Use the same argument for --target .
pip install --target layer/python \
  transformers tqdm scikit-learn scipy nltk sentencepiece
Lastly, install sentence transformers package without any dependencies.
pip install --target layer/python --no-deps sentence-transformersFull code to install cpu only SentenceTransformers:
Size of the module now:
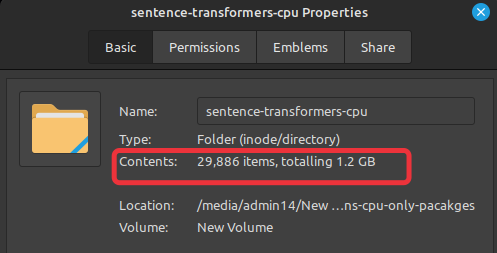
This is a 450% size reduction.
Download and Save models
In the Lambda, the desired SentenceTransformer model can be downloaded during the runtime. Alternate method is to pre-download the model and save it in EFS just like the main module. Then during runtime, load the model from EFS. This will shorten the runtime and will also provide more stability to your application.
- Start a jupyter notebook or execute the following commands in an IDE.
- Append the directory path to system path where we installed sentence-transformers in the previous section.
import sys

sys.path.append(
    "/media/admin14/New Volume1/projects/WORK/"
    "layers/py11/senttrans-cpu-only-pacakges/layer/python"
)  # CHANGE THIS TO YOUR PATH
3. Import the module
from sentence_transformers import SentenceTransformer4. Download the desired model
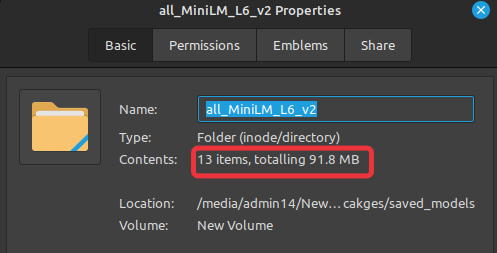
model = SentenceTransformer("all-MiniLM-L6-v2")5. Save it in the desired directory (Create the saved_models/all_MiniLM_L6_v2 directory first).
# !mkdir -p saved_models/all_MiniLM_L6_v2

model.save("./saved_models/all_MiniLM_L6_v2")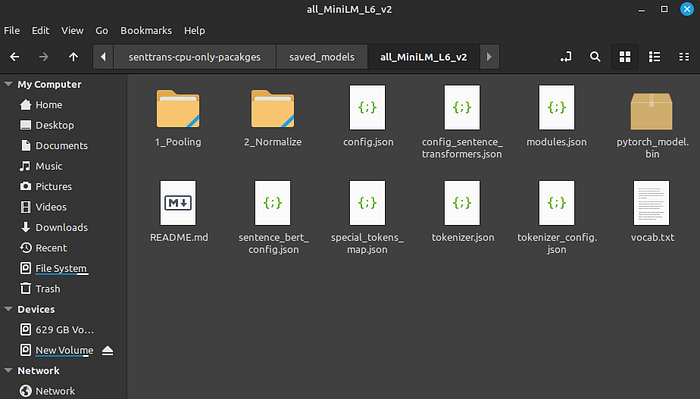
Size of our saved model:
Larger models will also work without any problem if given enough memory.
Now during the runtime, we can easily load this pre-saved model with the following command:
saved_model = SentenceTransformer(
    "SOME_EFS_PATH/saved_models/all_MiniLM_L6_v2"
)

sentences = ["This is an example sentence", "Each sentence is converted"]

embeddings = saved_model.encode(sentences)
print(embeddings.shape)

# Output : (2, 384)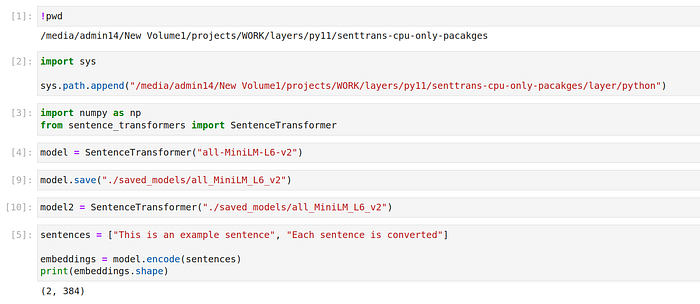
Now that we know how to install cpu only SentenceTransformers, we will execute the same instructions to install this module in EFS.
Using with EFS in Lambda
Lambda has a strict limit of 249MB for the combined size of layers and code for a single function. However, utilizing EFS allows us to incorporate packages or files much larger than that, enabling us to load up to 10GB of content into Lambda at once.
Lambda provides a temporary directory located at /tmp . This directory is stateless and can be configured to hold up to 10GB of data for a function. This feature is particularly useful if there is a need to download PyTorch models during runtime. By setting an environment variable, TRANSFORMERS_CACHE, to /tmp downloaded models can be saved in this directory. Similarly, when retrieving pre-saved models from S3, the same directory can be used to store the models until the function is warmed up.
To store packages and utilize them in Lambda from EFS, the following steps are required:
- Create an EFS volume and an access point for AWS Lambda.
- Store the packages in the EFS volume. This can be accomplished by either launching an EC2 instance, mounting the EFS on it, and installing the CPU-only Sentence Transformers module in EFS using the
--targetattribute, or by employing AWS DataSync. With DataSync, locally downloaded and zipped Sentence Transformer modules can be manually uploaded to an S3 bucket, then transferred to EFS using DataSync. Although this transfer is swift, it comes with certain trade-offs. Regardless of the method chosen to load the EFS with the module, either EC2 or S3, the same method can be used to load thesaved_modelinto EFS. - After loading EFS with the module and saved model, create a Lambda function and mount EFS on it.
Creating EFS volume and an access point
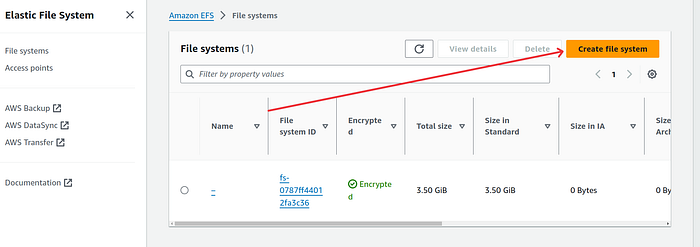
- Login to AWS console and search for EFS service.

2. Select EFS and on the new page click on the orange button “Create file system”
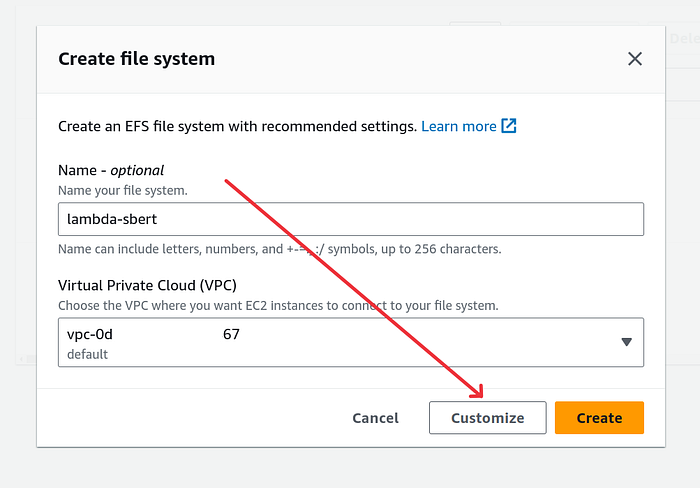
3. Give a suitable name and click on “Customize” button. I gave lambda-sbert name but you can also choose to leave it blank.
4. On the next screen, as you can see, I disabled the automatic backup option. In the past, I’ve encountered situations where deleting EFS didn’t remove their respective automatic backup jobs. This led to unnecessary charges because I couldn’t delete automatic backup jobs created by EFS. If you’re confident in your actions, feel free to adjust the settings as needed. Specifically for Python packages, I don’t see any need for backups.

5. Leave rest of the settings on this page as it is and click on the orange Next button.
6. On the Network access page, select the correct VPC and the respective AZs. I left the settings as it is because I only have one VPC in my account. Click on the orange Next button.
7. On the File system policy page, leave the policy empty. We will create a new policy and attach it to lambda later. Click on the orange Next button.
8. On the Review page click on the orange Create button once you are satisfied with all the settings.
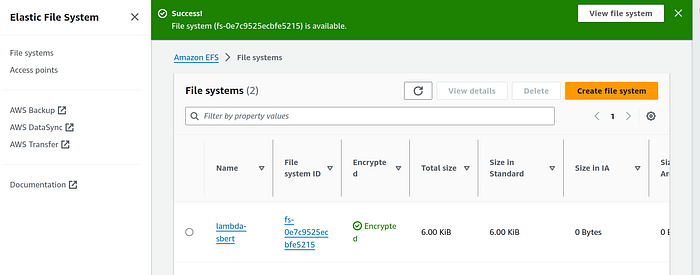
On the EFS landing page, you will now see the newly created EFS. After few seconds the file system state should change to “Available”.
Now we will create an access point for this file system.
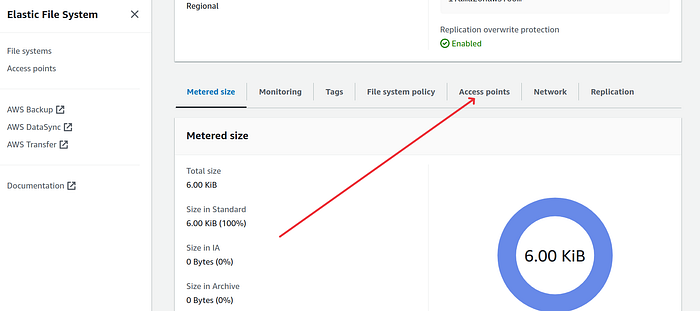
9. Click on the file system. On the file system page scroll down and click on the “Access points” tab.
10. Click on “Create access point” button and it will open the creating access point page.
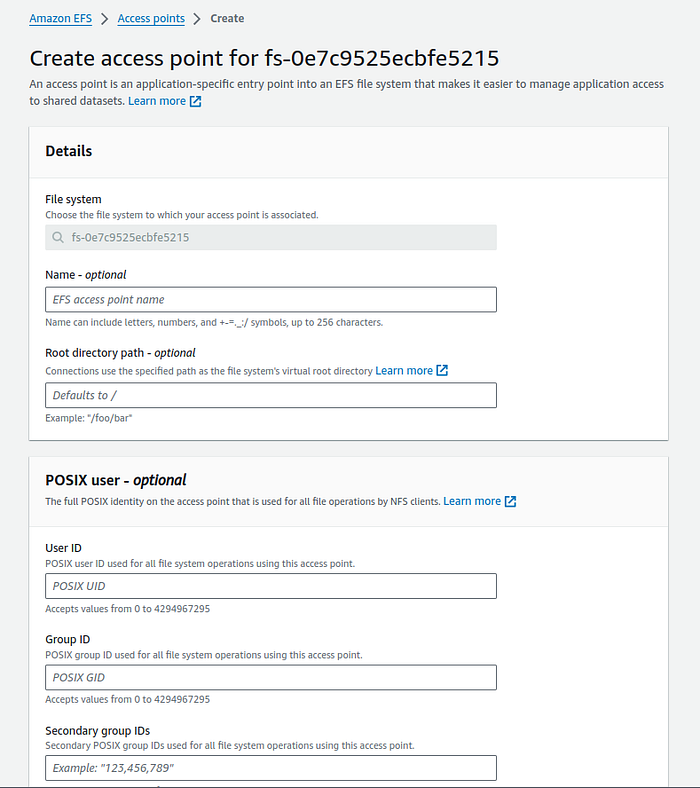
I recommend not entering anything in any input field. Leave the POSIX user and root directory permissions blank, then click on the orange button labelled “Create access point.”
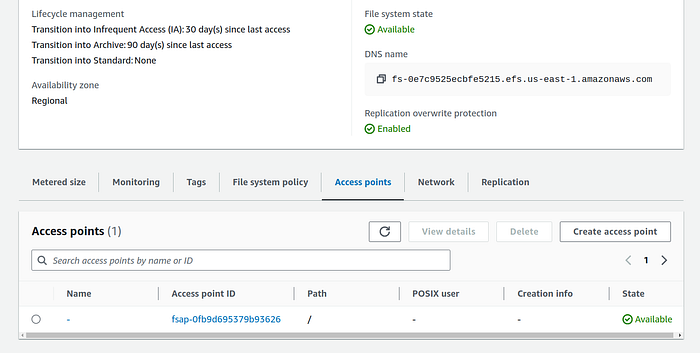
After a few seconds, the state of the access point should change to “Available.”
Loading EFS with SentenceTransformer and pytorch model
There are a few ways we can install the SentenceTransformer package in EFS. Not only this package, but we can also load EFS with other content using various methods. However, in this example, we will only focus on the SentenceTransformer package.
A simple method to place our Python packages in EFS is through an EC2 instance. We will launch an EC2 instance and, during the instance creation settings, we will mount our EFS. Alternatively, you also have the option to mount EFS after SSH-ing into the instance.
Once EFS is mounted on EC2, we will create an environment with a Python runtime. The Python version we use here will match our lambda’s Python runtime version. After creating the environment, we will simply install our packages using the pip --target command, which will point to EFS.
Steps to load python packages in EFS using EC2:
- Create a security group for EC2. This is optional. Please select the “Create security group for EFS” option during EC2 instance creation if you are not creating security group in this step.
— Search VPC service and locate the “Security groups” menu item from left side panel.
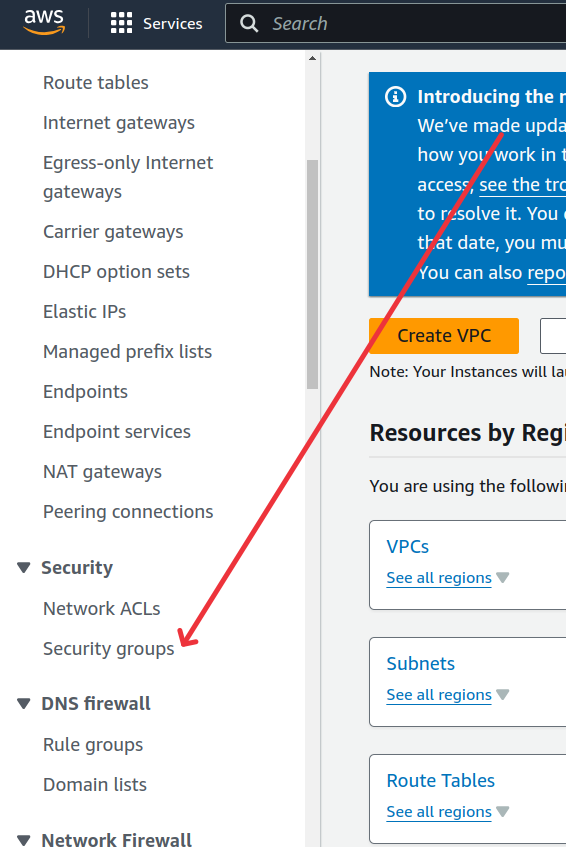
— Click on the “Create security group” orange button.
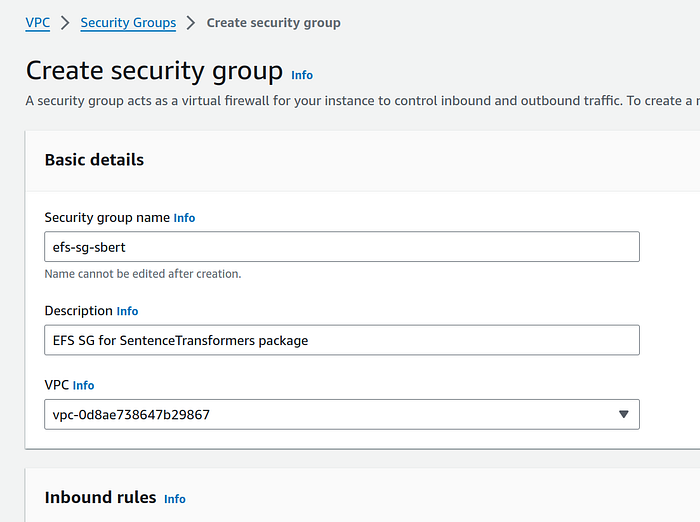
— Give a suitable name and description, I gave efs-sg-sbert name and click on “Create security group” orange button.
— Go back to Security groups landing page and click on “Create security group” ornage button again to create a security group for EC2 instance. I gave ec2-sg-sbert name.

— Scroll down and under Outbound rules section click on “Add rule” button. Choose Type as “NFS” and under destination address choose the security group that we created earlier. It should be efs-sg-sbert if you followed along with the name. Click on the correct option from drop down and give a description if you would like.

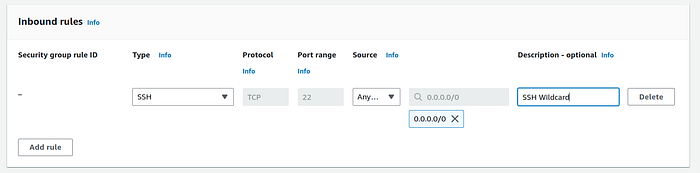
— In the Inbound rules section, click on “Add rule” button. Choose Type as SSH and in Source address select 0.0.0.0/0 . Give a description if you would like.
— Click on the orange “Create security group” button.
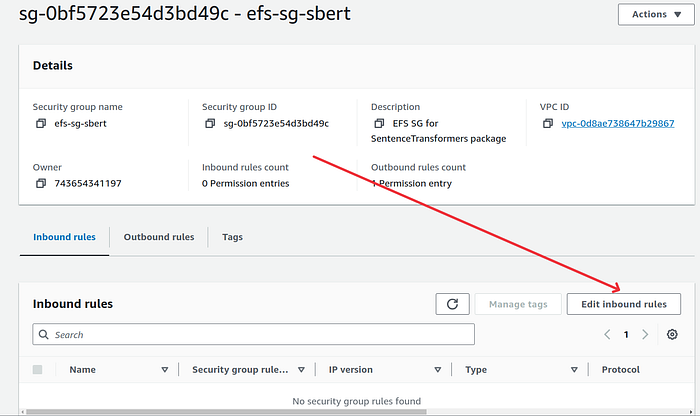
— Go back to the security group landing page and open the efs security group we created first. It should be efs-sg-sbert .
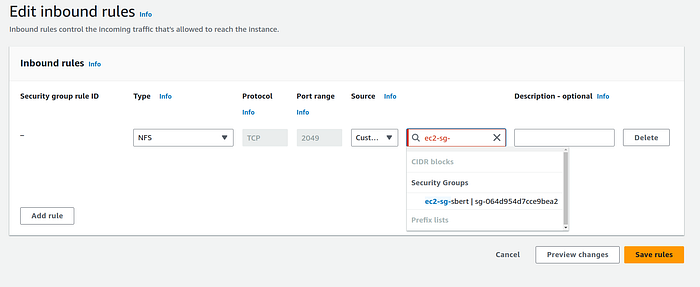
— Scroll down and click on “Edit inbound rules” button.
— On the edit page, click on “Add rule” button.
— Under Type choose NFS. Under source address, type the EC2 security grroup. It should be ec2-sg-sbert if you followed along with the name I gave. Give a description if you like and click on the orange “Save rules” button. (Don’t forget to click on the actual security group from the drop down as you type the name in source address.)
2. Go to EC2 service and on the instance page click on the orange “Launch instances” button.
3. On the Launch an instance page, give an apt name. I gave ec2-efs-sbert. Leave the AMI settings to default. In instance type section select t2.large. You can also experiment with smaller t2.medium instance. Select a key-pair or create a new one if you don’t have one.
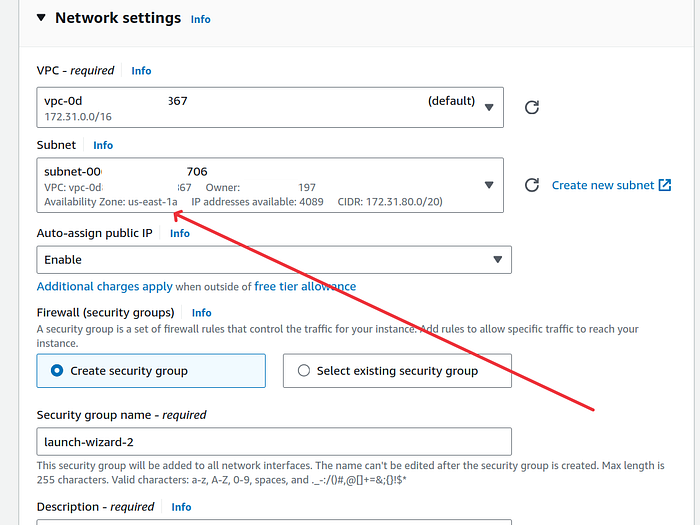
4. In Network settings section click on Edit button. In Subnet option, select one of the subnet’s in which your EFS is situated. This EFS setting can be found by going the EFS and click on the “Netwok” tab. You should see many AZs like us-east-1x. We edited the subnet because my EFS was in every AZ except us-east-1e. And I do not want to create this ec2 instance in that AZ. Therefore I selected us-east-1a in the ec2 network settings subnet option. This AZ is also there in my EFS.
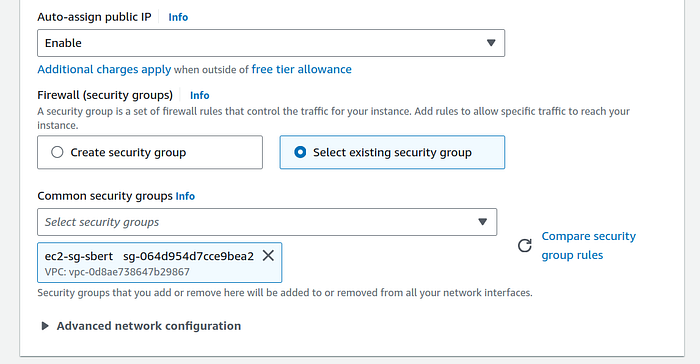
In Firewall option, click on “Select existing security group” radio button. Search for the ec2 security group that we created in previous section. It should be ec2-sg-sbert if you gave the same name as I did. (Do not edit this setting if you did not create custom security groups in step 1.)
5. In Configure storage section, click on the small Edit button (hyperlink) at the bottom of the box right acess “0 X File systems” text.

Select the file system that we created. Mine was lambda-sbert. Change the mount point to mnt/efs and uncheck the “Automatically create and attach security groups” checkbox if you created security groups in step 1 and chose “Select existing security groups” radio button in previous step.

Now click on the orange “Launch instance” button on the right panel.
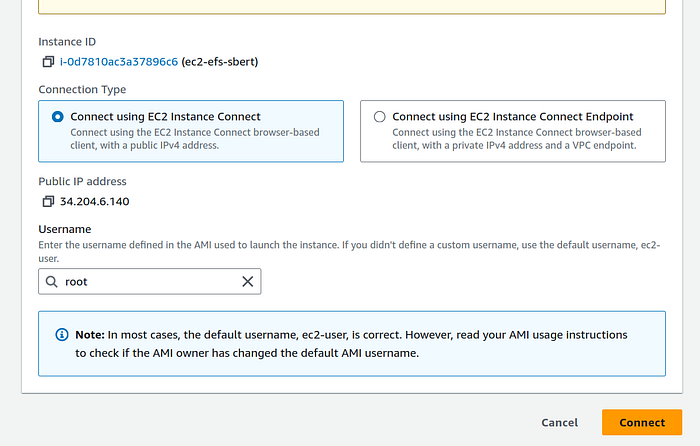
We will now ssh into the instance. I chose the option of ec2 instance connect but feel free to ssh via your CLI tool.
- Select the instance on the instances page, and on the instance summary page click on “Actions” button. From the drop down click on “Connect” option. (You can also use the “Connect” button directly.)
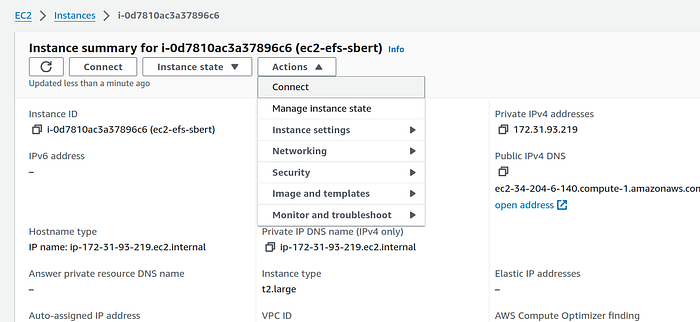
2. This will take you to Connect to instance page. Change the username to root and click on the orange “Connect” button.
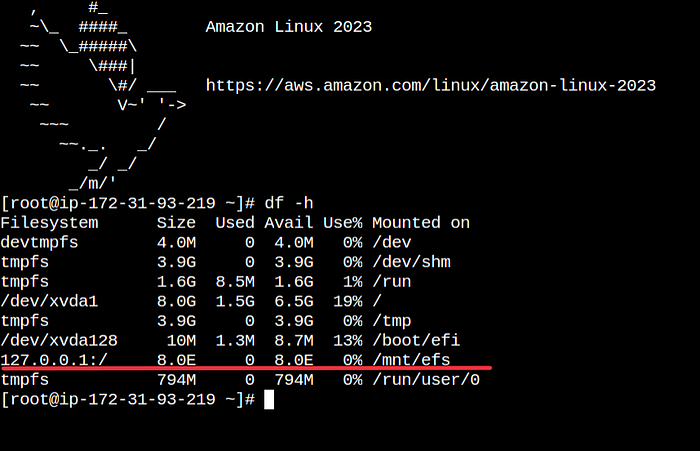
3. Check whether EFS is mounted correctly.
df -hYou should see /mnt/efs directory in the list.
We will now install minicoda on the instance. With miniconda we can create a environment with python 3.12 version. After python env creation we will execute sentence transformers CPU only command one by one, just like we did earlier.
- Install miniconda on the instance. Use the commands from the official documentation here.
mkdir -p ~/miniconda3
wget https://repo.anaconda.com/miniconda/Miniconda3-latest-Linux-x86_64.sh -O ~/miniconda3/miniconda.sh
bash ~/miniconda3/miniconda.sh -b -u -p ~/miniconda3
rm -rf ~/miniconda3/miniconda.sh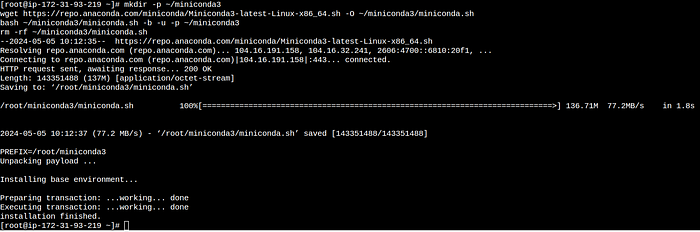
Initialize your newly-installed Miniconda and reopen the ec2 instance shell:
~/miniconda3/bin/conda init bash
~/miniconda3/bin/conda init zsh
2. Create a new env with python3.12 (or version of your choice. The version should also be supported by the Lambda runtime.) I gave efs-sbert name to my conda environment.
conda create --name efs-sbert python=3.12 pip -y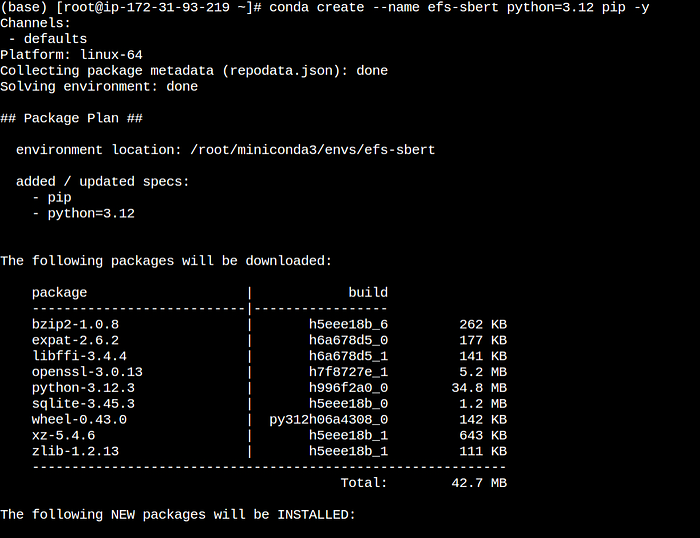
4. Activate the conda environment
conda activate efs-sbert5. Create directory inside efs to neatly arrange packages and model files.
mkdir -p /mnt/efs/python312/packages
mkdir -p /mnt/efs/models/all_MiniLM_L12_v2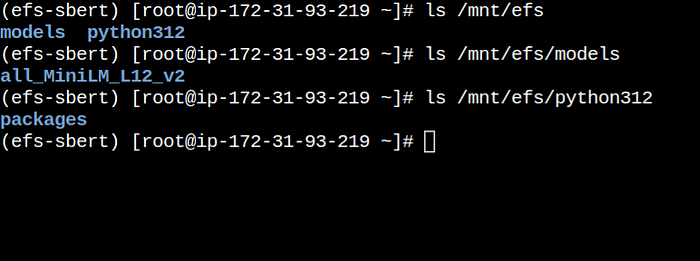
6. Install the packages in EFS one by one:
pip install \
  --target /mnt/efs/python312/packages torch torchvision torchaudio \
  --extra-index-url https://download.pytorch.org/whl/cpu
pip install --target /mnt/efs/python312/packages \
transformers tqdm scikit-learn scipy nltk sentencepiecepip install --target /mnt/efs/python312/packages \
--no-deps sentence-transformers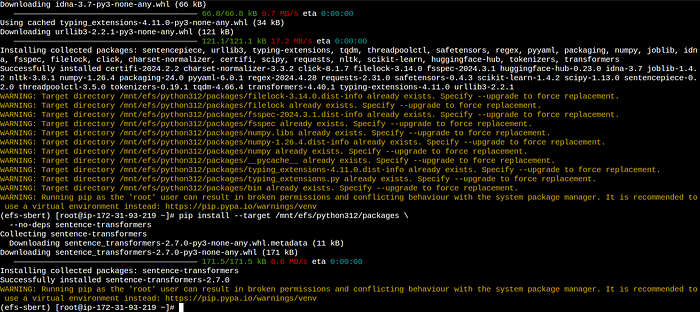
7. Download and save the SentenceTransformer pytorch model in EFS models directory.
Start python interactive env with:
pythonThen execute the following commands one by one:
import sys

sys.path.append("/mnt/efs/python312/packages")


from sentence_transformers import SentenceTransformer


model = SentenceTransformer("all-MiniLM-L6-v2")


model.save("/mnt/efs/models/all_MiniLM_L12_v2")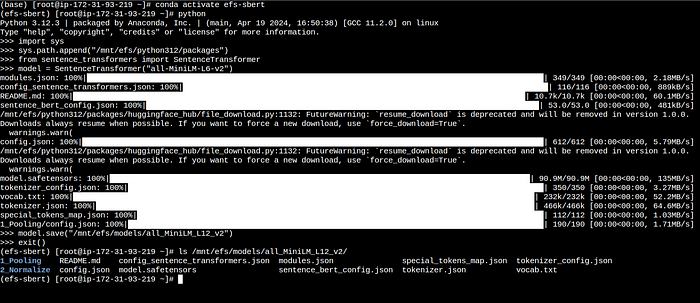
Type exit to exit the shell.
Now you should stop or terminate the instance to halt the billing from the Instance state dropdown on instances landing page.
Basic steps for loading Python packages into EFS using S3:
- Install the CPU-only Sentence Transformer locally and zip the directory.
- Upload the zip file to S3.
- Create an IAM role with permissions for DataSync, S3, and EFS.
- Create a new DataSync job to transfer the zip file from S3 to EFS.
- Initiate the job and await its completion. It should take a couple of minutes for the job to finish successfully. Check S3 for any failed job logs.
- At this stage, we need to extract the contents of the zip file. This can be done by either using an EC2 instance to extract the zip by mounting EFS or using Lambda to perform the extraction.
- To extract the zip using Lambda, allocate 5–6GB of memory to Lambda if the package size is around 2GB. Set the Lambda timeout to 15 minutes. Execute bash commands from Lambda to extract the zip file in EFS.
So far, we have loaded our EFS volume with the Sentence Transformer package and its respective model. Now, we will create a Lambda function to invoke the package and generate some embeddings.
Creating Lambda
Now that we have sentence transformer package in EFS and also the pytorch model, we will invoke it from Lambda.
- Go the Lambda service and click on the orange “Create function” button.
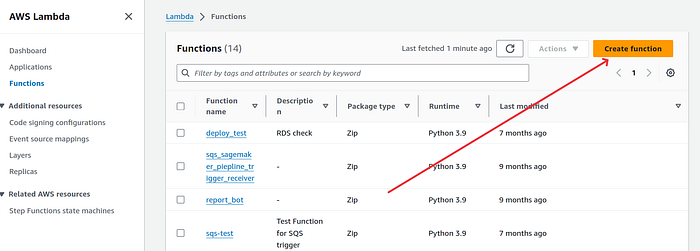
2. Give a desired function name. I gace sbert-from-efs name to my function. Choose the correct runtime. If you followed along with python version then you should choose Python 3.12.

3. Scroll down and click on “Enable VPC” checkbox. We do this because our EFS is in the VPC.
Select the correct VPC. I only have one so I chose the default one.
From the subnet, choose only 1 subnet for now. Make sure the chosen subnet is also there in EFS network options. If you left the network setting to default while creating EFS then us-east-1a can be chosen. Double check this in your EFS network settings.
Under security groups, select both efs-sg-sbert and ec2-sg-sbert security group and your default security group.

Once satisfied, click on the orange “Create function” button.
4. Go to the IAM service and click on Policies. On the policies landing page, click on the orange button “Create policy”.
Switch to JSON panel and paste the following policy after replacing your AWS account id with YOU_AWS_ID:
{
    "Version": "2012-10-17",
    "Statement": [
        {
            "Sid": "VisualEditor0",
            "Effect": "Allow",
            "Action": [
                "elasticfilesystem:*"
            ],
            "Resource": [
                "arn:aws:elasticfilesystem:*:[YOU_AWS_ID]:access-point/*",
                "arn:aws:elasticfilesystem:*:[YOU_AWS_ID]:file-system/*"
            ]
        }
    ]
}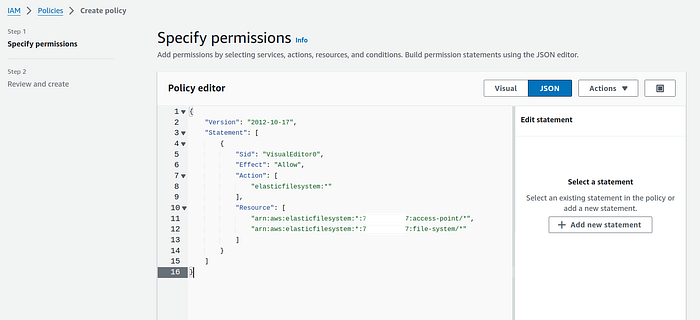
Click on Next button. Give a suitable name and description. I gave EFS-Read-Write-Policy name to this policy
Click on the orange “Create policy button”.
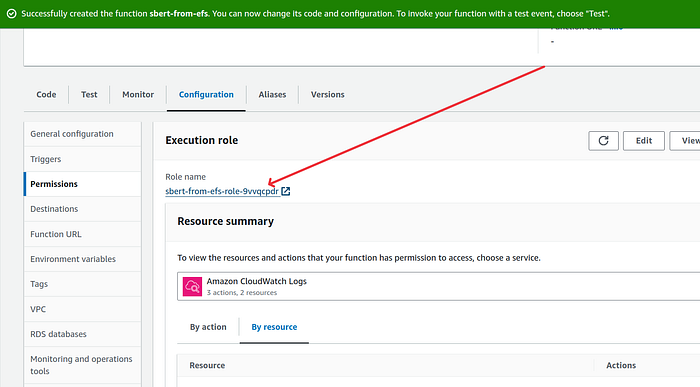
5. Open the lambda that was created. On the configuration panel, click on Permissions tab. Click on the Role name.
On the IAM role page, click on “Attach permissions” button and choose Attach policies option.
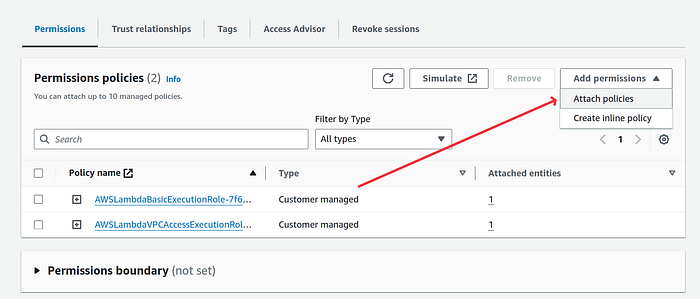
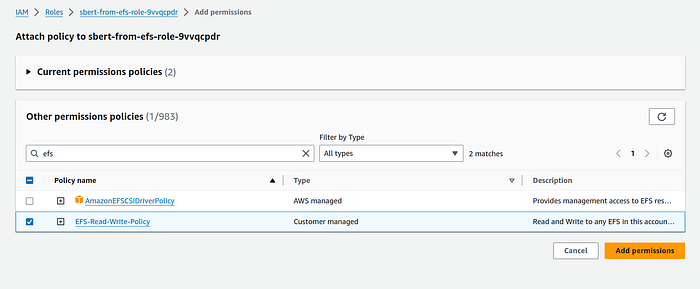
Search for the previously create policy for efs. Mine was EFS-Read-Write-Policy . Click on the orange button Add permissions after selecing the correct policy.
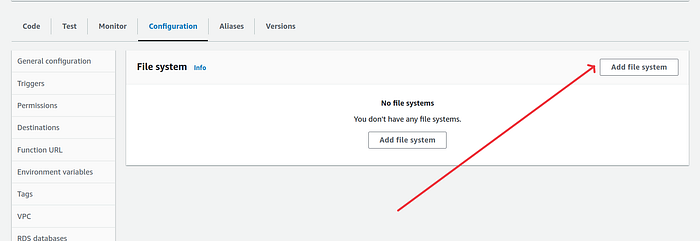
6. Go back to the Lambda function. Under configuration panel, select File systems and click on “Add file system”.
On add file system page, choose the file system. Mine was lambda-sbert . Choose its respective access point.
Enter the local mount path as /mnt/efs
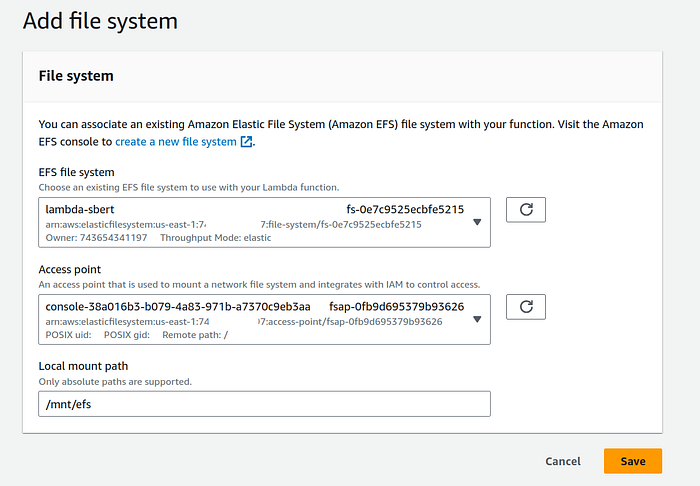
Click on the orange “Save” button.
7. Also change the lambda timeout and memory limit by clicking on General configuration option and then on Edit button.
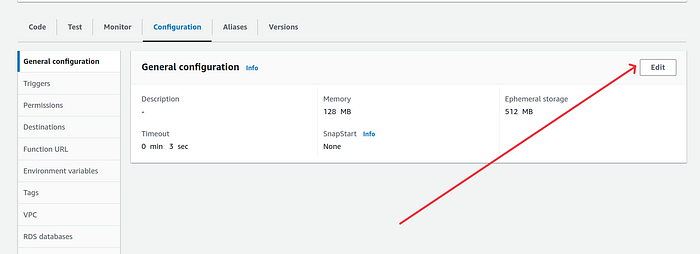
On the edit basic settings page, increase the memory to 1024 and change the timeout to 1 min 0 sec. If you are using a bigger pytorch model then change the memory and timeout settings as desired.
8. In the ‘Environment variables’ setting, click on Edit button and add a new environment variable.
TRANSFORMERS_CACHE , with value as /tmp
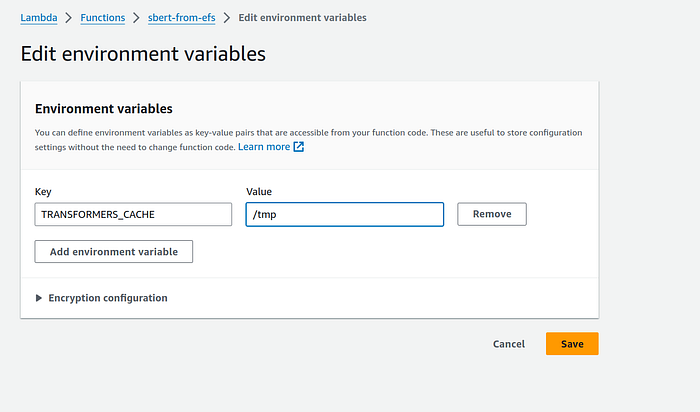
Click on the orange “Save” button.
Now we are ready to invoke the sentence transformer model in lambda.
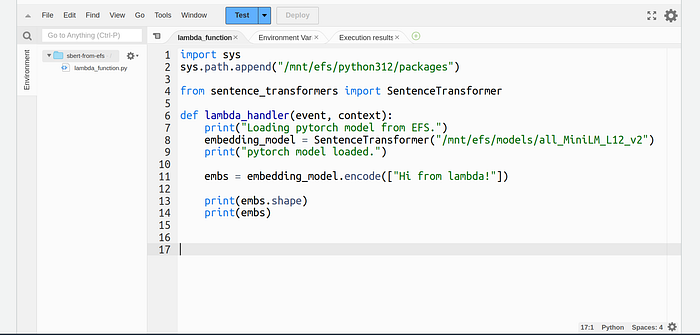
Paste the following code in lambda. If you changed directory paths from what was mentioned in this article then replace them with your paths.
import sys
sys.path.append("/mnt/efs/python312/packages")

from sentence_transformers import SentenceTransformer

def lambda_handler(event, context):
    print("Loading pytorch model from EFS.")
    embedding_model = SentenceTransformer("/mnt/efs/models/all_MiniLM_L12_v2")
    print("pytorch model loaded.")

    embs = embedding_model.encode(["Hi from lambda!"])

    print(embs.shape)
    print(embs)
When you will invoke this function, you will see the embeddings in the function logs.
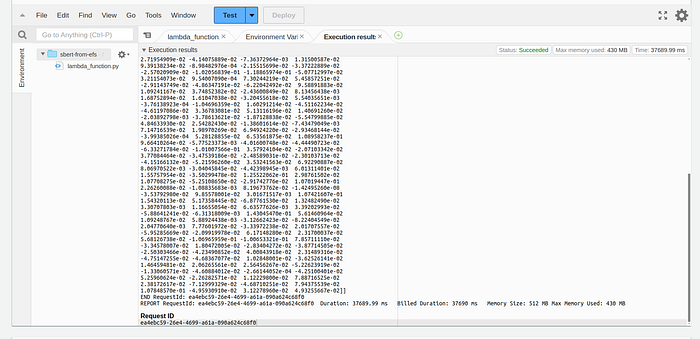
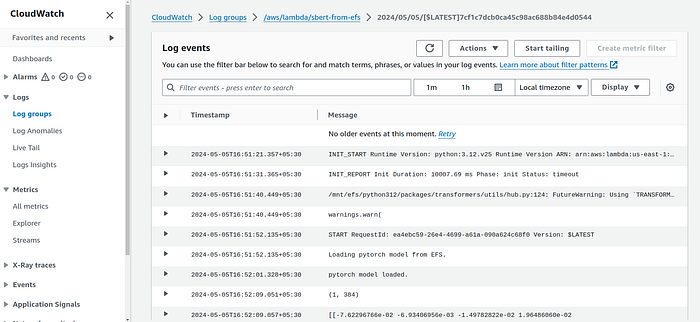
The logs will also be visible in the cloudwatch.
Congratulations on getting this far, give yourself a pat on the back :)
Overview of other methods
Using with Lambda container images
If creating an EFS volumen and loading necessary packages and models seems like too much work, you can opt for building a container image for your Lambda function with some basic container knowledge. Here’s how you can do it:
- Start by using one of the AWS base images for python
- Follow the steps to install the CPU-only Sentence Transformer or simply perform a normal pip install of the package (manually copying all package files from the local system can be time-consuming).
- Specify the directory for downloading the PyTorch model during runtime or copy already downloaded model files.
- Copy the Python file that will invoke the model and create the entry point.
This method is similar to the EFS method. However, you won’t see any improvement in Lambda initialisation with this approach.
SageMaker Endpoint
You can deploy SentenceTransformer just like any other HuggingFace model on the SageMaker endpoint.
You can choose between dedicated and serverless endpoint depending on the size of the pytorch model.
The problem with this approach is that you will still require PyTorch to perform correct mean pooling of the model’s output. Many online articles suggest using a basic pooling function, but then the embeddings generated by the pip-installed SentenceTransformers package are not the same as those from the SageMaker endpoint using the following pooling function.
# Incorrect method
def cls_pooling(model_output):
    return [sublist[0] for sublist in model_output][0]
Correct way to do mean pooling (source):
from transformers import AutoTokenizer, AutoModel
import torch
import torch.nn.functional as F


#Mean Pooling - Take attention mask into account for correct averaging
def mean_pooling(model_output, attention_mask):
    token_embeddings = model_output[0] #First element of model_output contains all token embeddings
    input_mask_expanded = attention_mask.unsqueeze(-1).expand(token_embeddings.size()).float()
    return torch.sum(token_embeddings * input_mask_expanded, 1) / torch.clamp(input_mask_expanded.sum(1), min=1e-9)


# Sentences we want sentence embeddings for
sentences = ['This is an example sentence', 'Each sentence is converted']

# Load tokenizer from HuggingFace Hub
tokenizer = AutoTokenizer.from_pretrained('sentence-transformers/all-MiniLM-L6-v2')

# Tokenize sentences
encoded_input = tokenizer(sentences, padding=True, truncation=True, return_tensors='pt')

# Compute token embeddings
data = {
  "inputs": sentences
}
# Assuming we use above mentioned code to deploy model on SageMaker endpoint
model_output = predictor.predict(data=data)

# Perform pooling
sentence_embeddings = mean_pooling(model_output, encoded_input['attention_mask'])

# Normalize embeddings
sentence_embeddings = F.normalize(sentence_embeddings, p=2, dim=1)

print("Sentence embeddings:")
print(sentence_embeddings)
So, with this method, there is no way to avoid dealing with large packages.
SageMaker BYOC (Bring you own container)
With SageMaker inference Bring Your Own Container (BYOC), you can create a custom inference container using the sagemaker-inference-toolkit. This method provides maximum control over the endpoint, but it is relatively more complex than other methods.
Using BYOC, you can create a single or multi-model endpoint. With a multi-model endpoint, multiple models reside behind a single endpoint. SageMaker automatically offloads unused models to make space for new ones. The model files are stored in S3, and the invocation payload determines which model to invoke. SageMaker downloads the model from S3 after receiving the request if it’s not already loaded in memory.

SageMaker’s multi-model endpoint, sourced from BYOC, is best suited for production applications that require low latency for Sentence Transformer. With a multi-model endpoint, you can use multiple Sentence Transformer models without managing numerous endpoints.
Please note that the multi-model endpoint is only available for SageMaker’s dedicated endpoint type.
When to choose which approach
- For low-latency applications, opt for SageMaker BYOC with a dedicated endpoint (single or multi-model).
- For batch requirements, consider Lambda with EFS or Lambda containers.
- To create an entire serverless architecture, utilise BYOC and a serverless SageMaker endpoint.
Connect with me on LinkedIn: https://linkedin.com/in/maheshrajput